
Making moxa in the sunshine!
- May 14, 2018
- 5 min read
This blog is all about making pretty good quality moxa with limited technology (we LOVE intermediate technology!). You only really need a pestle and mortar (made of granite and not too smooth) and an ordinary kitchen sieve.

Access to some form of blender/blitzer also helps though. So does a mask because mugwort dust gets right into the back of your throat and can be bloody irritating.
And one other thing is important, of course – some mugwort.

This mugwort was grown in UK, but the strain is Japanese (Artemisia princeps or yomogi) if you want to be technical. It was harvested just after midlsummer (it’s mid-May now in the following year). It was cut 'whole plant' stalks-and-all, and initially wasdried on the stalk as much as possible in the sunshine. (We’re talking UK sunshine so this is anything but easy here). Once it was pretty dry, the leaves were roughly stripped off the stalk and it’s been left to continue drying in a garage all through winter (which has been a long and pretty miserable one here in the UK if you want to know…)
You can see from the photo above that the tops of the leaves have turned a pale green, and the undersides are still silvery. That silver is the down on the underside of the leaf – and the more down there is in the final floss the better quality of the moxa will be (making it burn faster and at a slightly lower temperature). It’s also more fragrant. That's what we're after!
So here’s the plan: what we’re going to do is grind out all of the stalks and the green leafy matter, and just leave the down.
So let the processing begin!
First step, take the mugwort out of storage and begin a little more force drying in a low oven (we use a top oven heated from the oven below). The idea is to get the mugwort as dry as possible and to slow-burn out some of the volatile oil residues, and unless you live in the Mojave desert this is definitely a really good idea. A word of warning though: mugwort is by definition easily combustible – don’t tempt fate by heating it too high heat or you may have to redecorate your kitchen (or worse).
While you’re drying the mugwort it’s also a good idea to dry out the pestle and mortar at the same time in the same oven. There’s bound to be residual moisture in the stone, and you really don’t want to push this into the dried leaves while you’re grinding them.
A rich herby smell should be starting to fill your kitchen – (that’s the oils drying out).
Give it an hour or two, and take the mugwort and the pestle & mortar out – and this means not just out of the oven but right outside because you’re soon going to be making some serious dust.
Take a manageable handful of the dried leaves and start work – bashing and grinding them in the mortar (which may well be too hot to handle so you may need to use a cloth to hold the pestle). The leaves will start clumping. Give it a good 3-4 minutes then take them out and add the next handful and the next until you’ve given your whole load of moxa its first grinding. Some green dust may already have appeared in the mortar, so this needs emptying out, and also it won’t hurt to rub each handful of mugwort around a bit in the sieve. You can do worse than do this over a flower bed, away from any windows (or washing): mugwort leaf dust is fine and carries easily in the wind, It'll stain anything it settles on a lovely green.

Okay so now it goes back in the oven, along with the mortar and pestle for another dry-out. Give it 20 minutes this time. Then out it comes again, and then give it another good working over in the mortar, again in manageable handfuls. This time definitely give each handful a good rub in the sieve afterwards over a flowerbed. You’ll soon see it coming together into a more homogeneous floss. Then it’s back into the oven again (along with the pestle and mortar so you’re keeping everything as dry as possible.
Back out again, twenty-odd minutes later, and another good work out handful by handful with the pestle and mortar and the sieve. Now it will be changing even more. Each time it will be turning a little more yellow and there will be a green dusty residue that needs emptying out of the mortar, and more dust falling through the holes in the sieve.

Another work out, and now it’s starting to reduce in bulk, as well as increasingly coming together.

So it’s back in the oven for another dry – and now we start to give it a bit of an extra hit with an electric blender. You’ll have noticed by now that while the floss is getting more and more like moxa, it’s also getting a bit stringy because of all the grinding, so we need to cut it up a bit. Warning – this can get a bit messy!

Chuck a manageable amount of the floss into the blender (definitely don’t fill it more than half way up because it will explode out the top if you do. You can use a light cardboard tube to gently push the floss down as you pulse the blender. This process will create a LOT of dust. Use a mask if you have one, and if you haven't tie a t-short round your mouth and nose.

Then it’s back over the flower bed with the sieve, and then back into the oven. Give it ten and then give it another grind with the pestle and mortar as before.

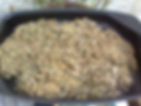
Now you’ll be seeing something that is really looking like good quality yellow moxa. And there’s a lot less of it now as well. Give it another round with the blitzer and the pestle and mortar, and with a bit of luck you’ll find almost no dust coming out, both in the blender, and from the sieve. This will probably be good enough to use – to roll into half rice grain cones and to smoulder over acupoints at a reasonable heat.

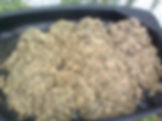
To give an idea of what sort of reduction you’re looking for, here are after and before shots of all the mugwort used and what it prodced in the same basket:


Finally (before popping it into some plastic bags for safe keeping) give it a good smell. It should have a pleasant fragrance – one that it really didn’t have at the outset.
Happy days!


